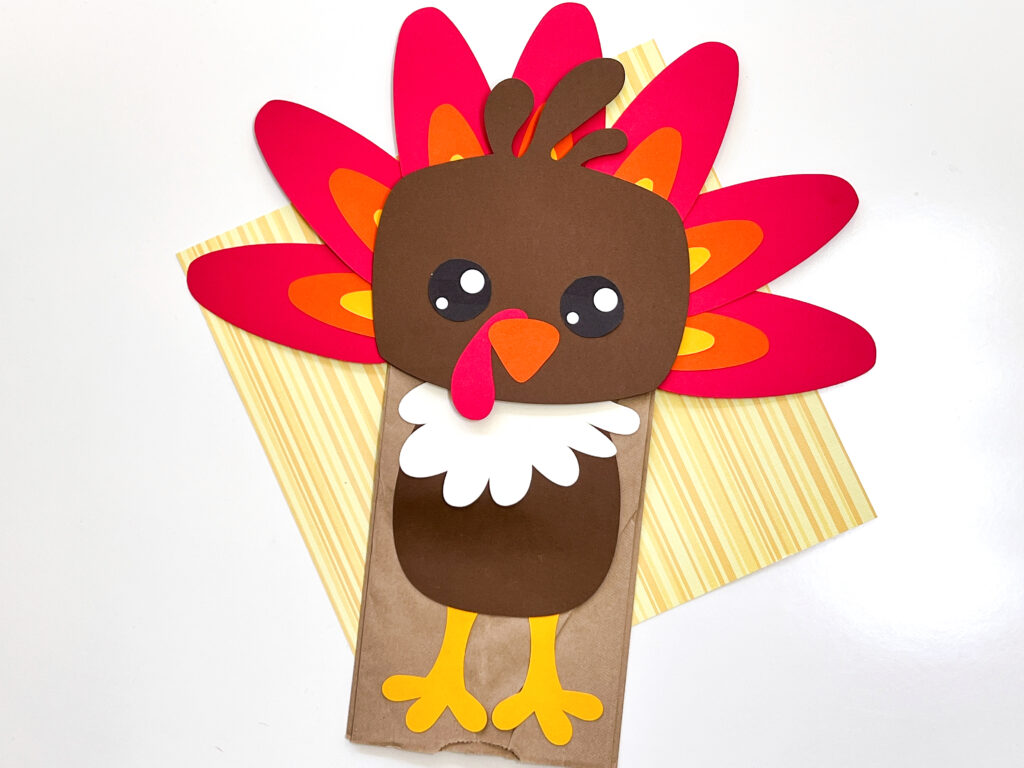
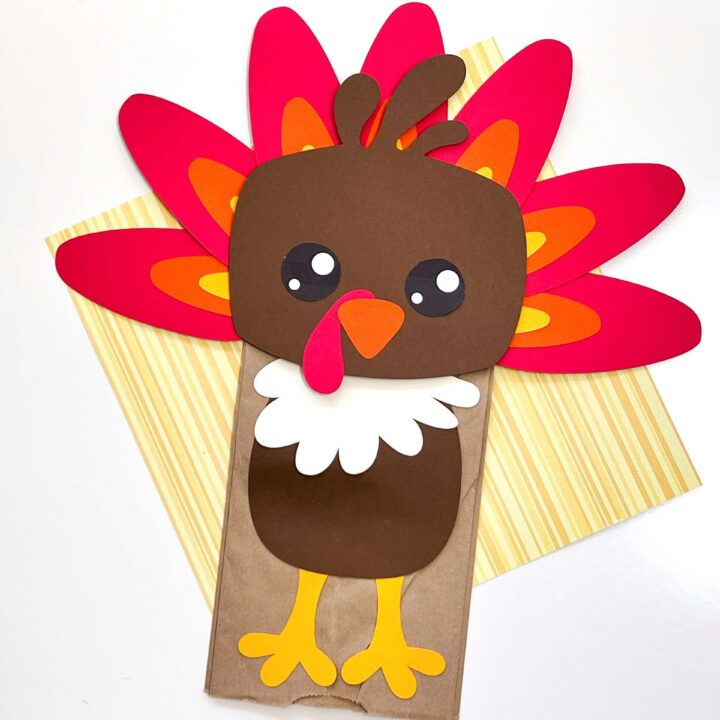
This Paper Bag Turkey Craft is a fun Thanksgiving craft that kids of all ages will love making! Bright feathers, cute shapes, and silly eyes make cute little turkeys and an irresistibly fun project!
When you have kids (or are hosting kids) at Thanksgiving, there are a couple of universal truths:
- Dinner ALWAYS takes longer than planned.
- The kids get HUNGRY (and bored) while waiting to feast.
And when kids are hungry and bored, meltdowns can happen.
So, how do you keep kids happy and entertained while they wait? I have found crafts and activities like these cute turkeys to be the perfect solution!
In the past, I’ve shared how to make a Thankful Thanksgiving Tree Craft. That’s a fun interactive craft for both kids and adults (and it makes a pretty great decoration for the Thanksgiving table!). Plus, this turkey craft and my pumpkin crafts make GREAT Thanksgiving activities!
Today, I have a craft I can’t wait to share with you! This Turkey Paper Bag Craft is geared for kids 2 years old and up. It’s a simple craft that kids of nearly any age will enjoy.
Fun Thanksgiving Turkey Crafts And Activities
- Best Free Thanksgiving Coloring Pages For Kids
- Thanksgiving Craft – Paper Plate Pilgrim Craft
- Check Out 21 of the Best Thanksgiving Books for Kids
- Thanksgiving Oreo Turkeys Cookies
How To Make This Paper Bag Turkey Craft
Feel free to use this Turkey Paper Bag Craft in classrooms as a project to celebrate Thanksgiving Day. It’s easy and cheap to accomplish.
FIRST, grab the free printable template by clicking the image below! 👇👇
Craft Supplies Needed
The items needed to make this paper bag turkey fun craft are standard craft supplies that you probably already have.
- Pattern template
- Printer and cardstock paper
- Paper lunch bag
- Scissors
- Glue sticks or glue dots
- Googly eyes (optional)
Turkey Paper Bag Craft Instructions
Once you grab those simple supplies, just follow these steps to create this fun and festive craft!
Step 1 – Download The Template
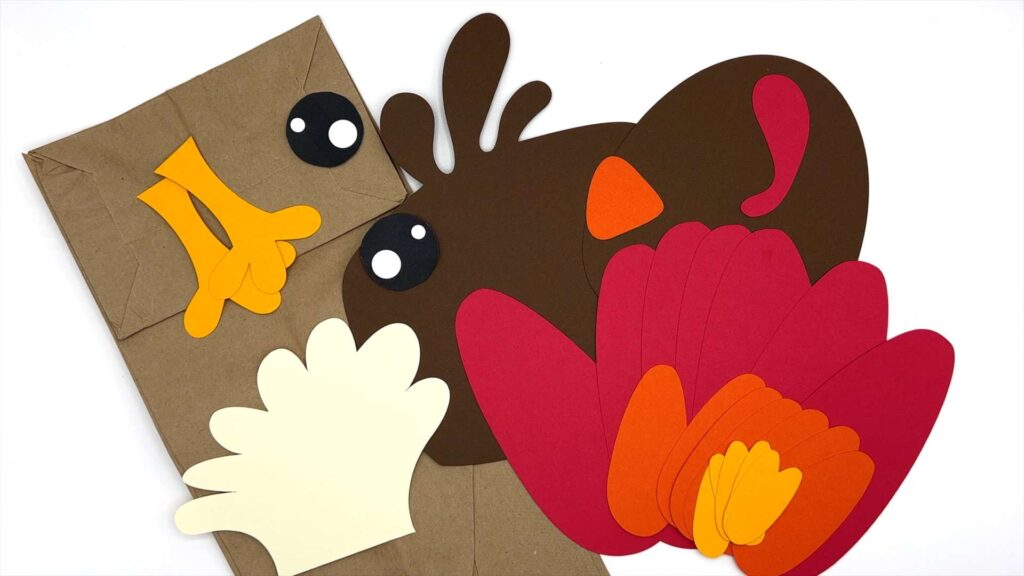
Download and print the pattern and cut out pieces as indicated.
Step 2 – Make The Turkey’s Feathers
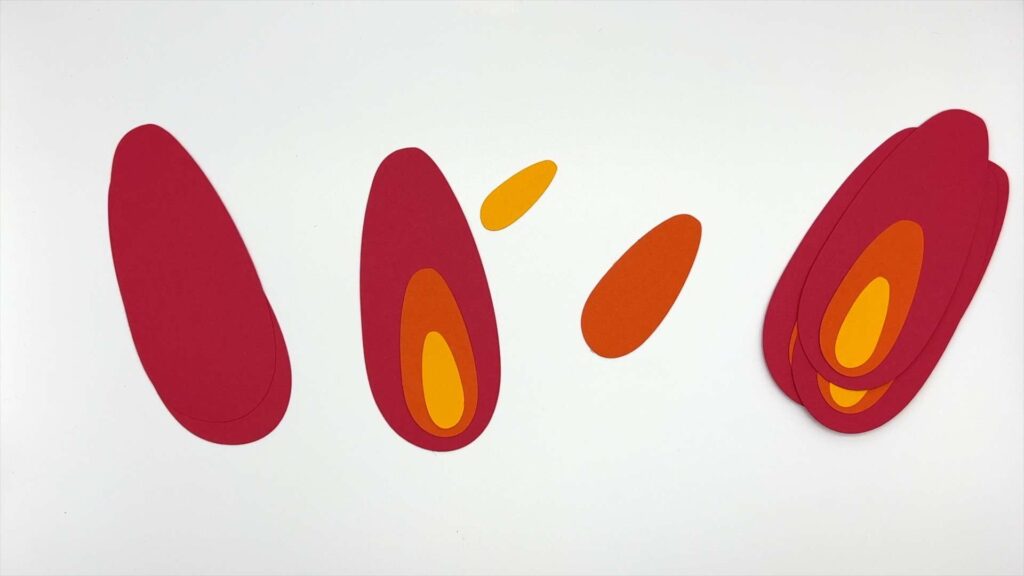
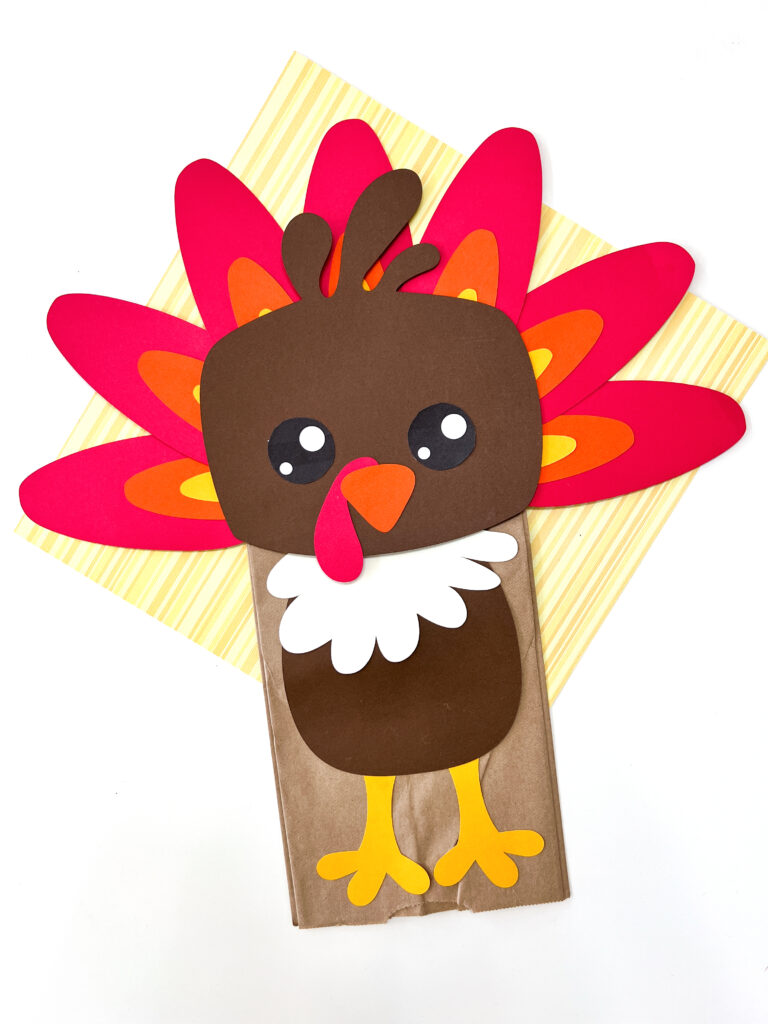
Assemble 7 feathers for these adorable turkeys by layering the 3 sizes and gluing them together.
Step 3 – Fan Out The Feathers Of The Thankful Turkeys
Glue the feathers onto the bottom flap of your bag in a fan shape.
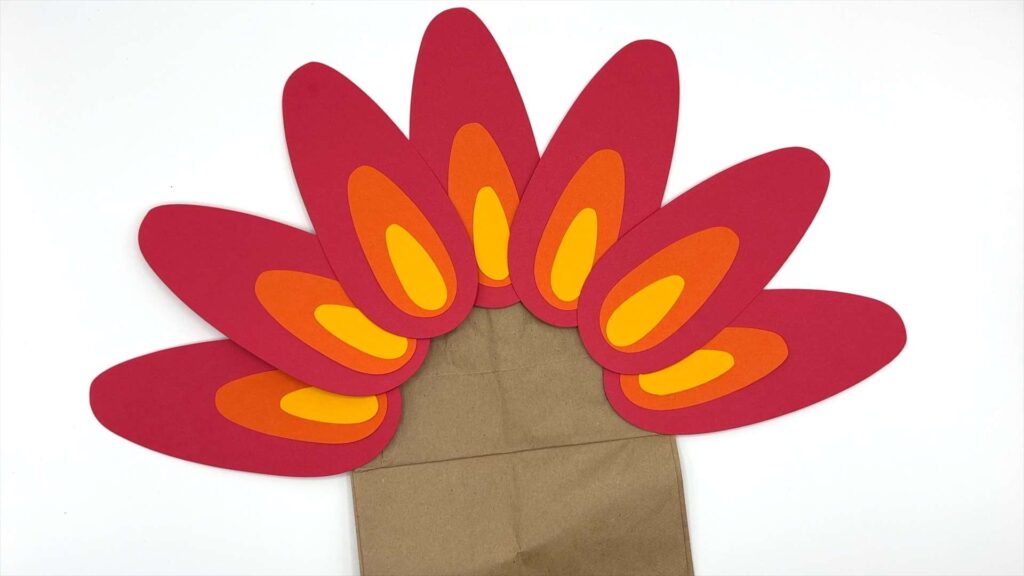
Step 4 – Add The Head To This Simple Turkey Craft
Glue the headpiece onto the flap over the feathers.
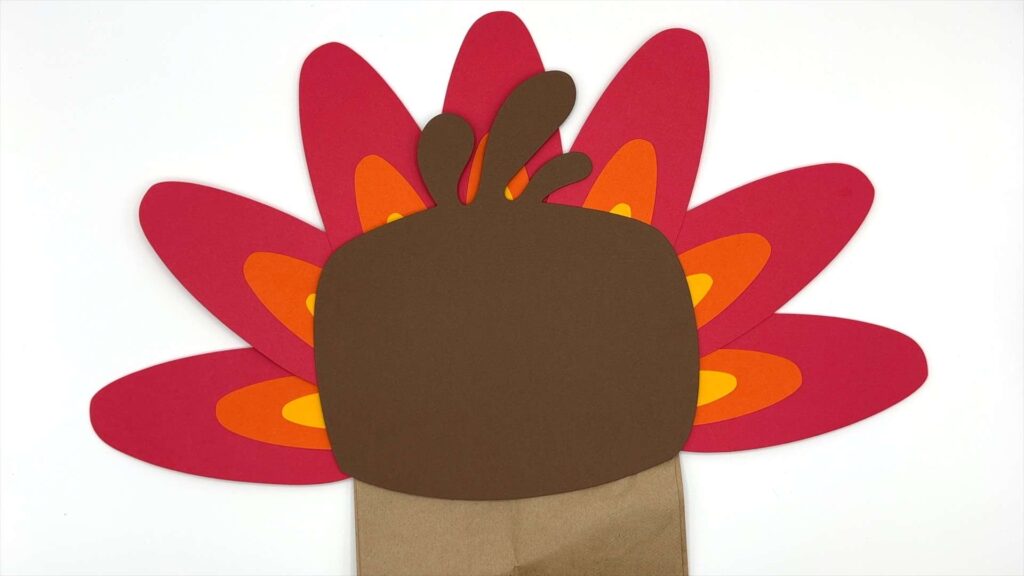
Step 5 – Assemble The Turkey Body
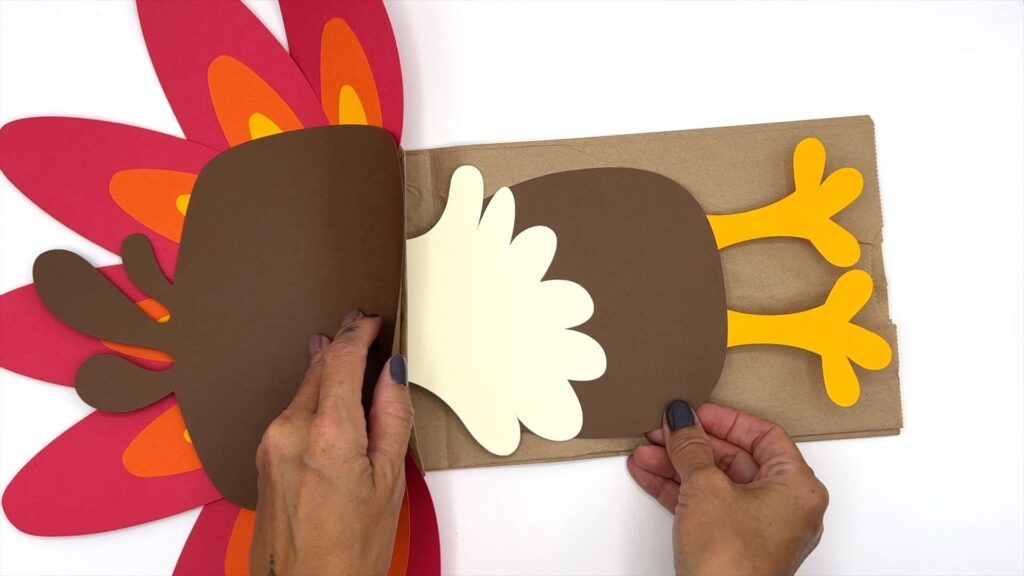
Let’s put the turkey’s body together. Glue the chest feathers and legs onto the body piece. Then glue this onto the bag, making sure you slide it a little under the head flap.
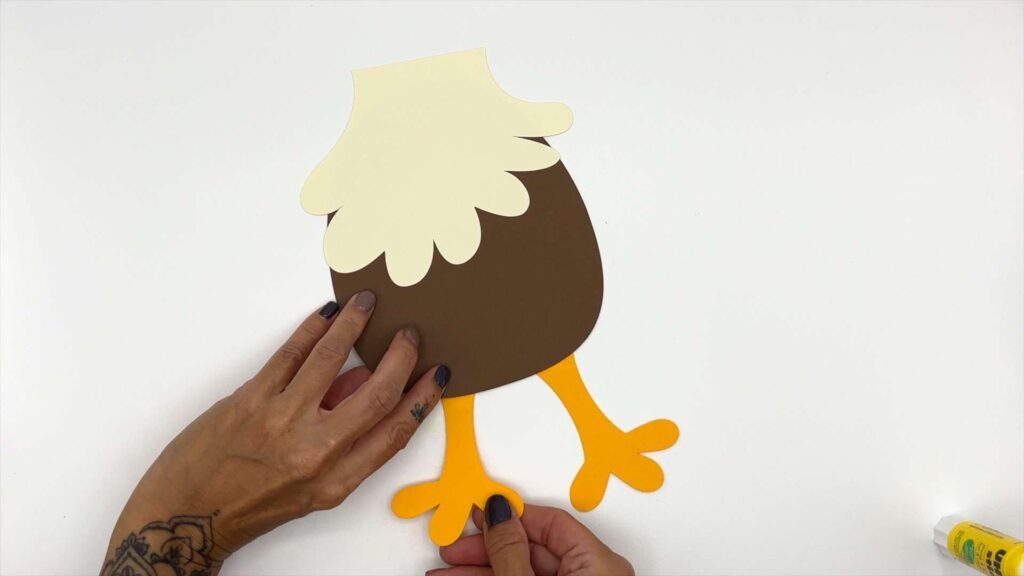
Step 6 – Finish Your Cute Little Turkey Craft
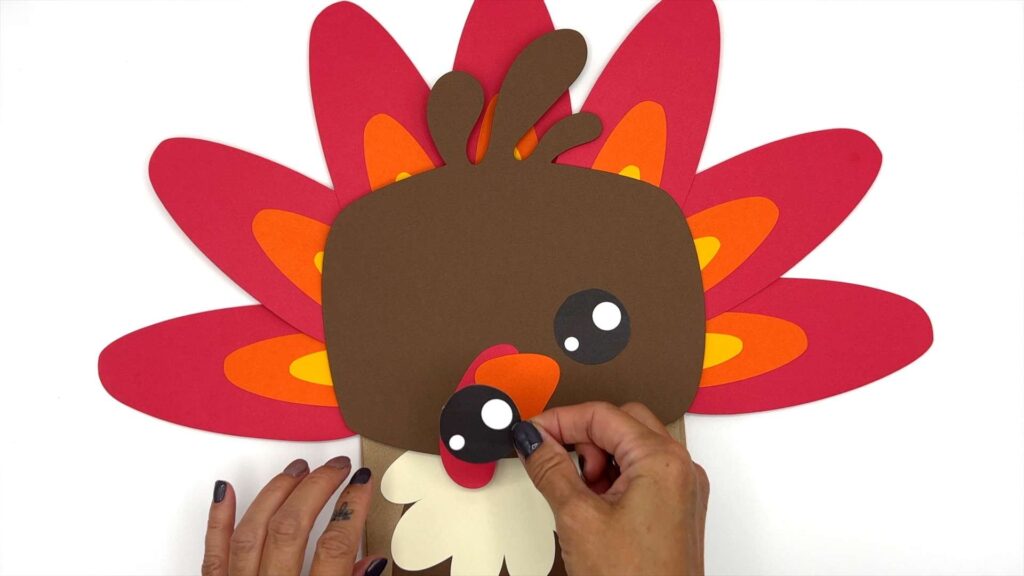
Finish off by adding the snood to the head first, then make the turkey’s face by adding the beak and the eyes last.
Craft Variation Ideas
- Cut out your own feathers – and even make them multi-colored with construction paper!
- Make a handprint turkey! Cut out your child’s handprints on different colors of construction paper and layer them to make the feathers.
- If your child is old enough to understand the concept of being grateful, let them tell you what they’re grateful for and write one down on each feather.
- If your child can write, ask them to write down what they are grateful for – one thing on each feather.
Paper Bag Turkey Craft Notes
This is one of those easy turkey crafts that’s GREAT for kids to do while the adults are mingling and dinner is cooking.
Older kids can help younger kids practice their fine motor skills with cutting, gluing, and writing.
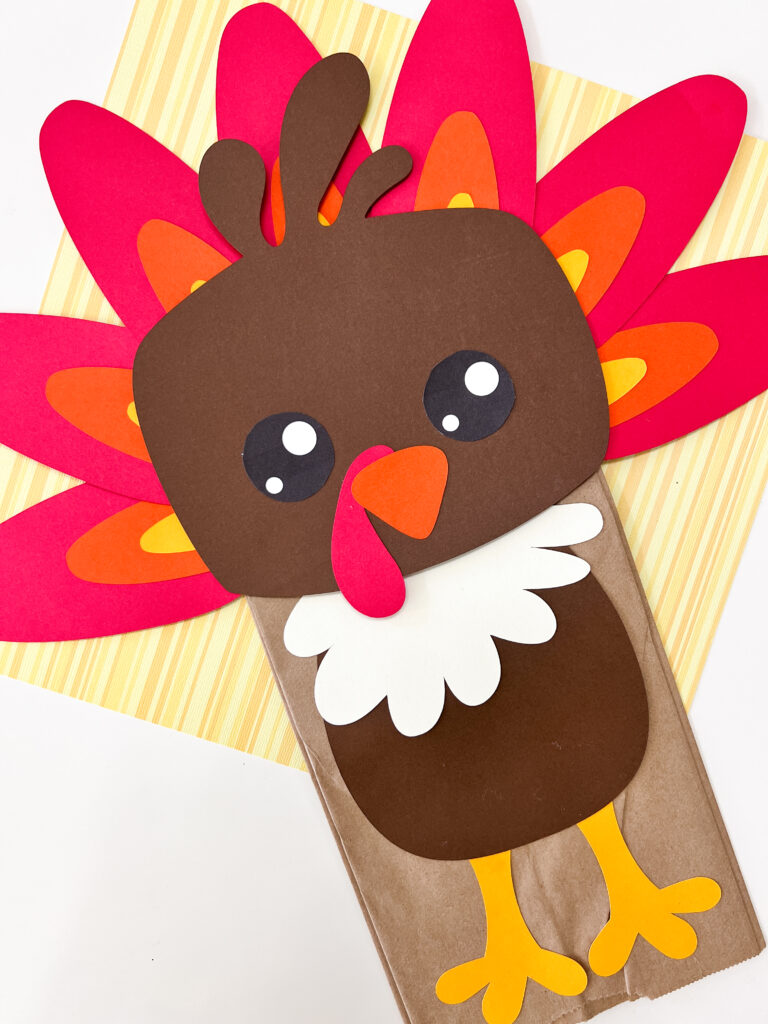
Once complete, these fun turkey crafts can become holiday decorations or hand puppets!
There are so many uses for this cute turkey craft!
Turkey Paper Bag Craft FAQs
Here are a few questions I often see readers ask about making this craft. If you have a question but don’t see it answered below, please leave it for me in the comments!
When it comes to making paper crafts, I always highly recommend using a glue stick or craft glue (like Elmer’s).
However, for this particular craft, those types of glues may not have a strong enough hold. If you want something stronger, try using hot glue or glue dots.
SAFETY NOTE: please only use a hot glue gun with an adult when younger kids are doing this craft to prevent burns.
I love the way that traditional brown lunch bags look since turkeys are brown-ish. However, if you want to change up the craft, you could always use white paper lunch bags and use brown paint to make this great turkey craft!
Don’t forget to grab the free turkey template by clicking the image below! 👇👇

Extend This Activity – Thanksgiving Books To Read With Kids
Below are some good books that cover various Thanksgiving topics for kids! Reading aloud to them is always a great way to reinforce new concepts and build vocabulary, and enjoy Turkey Day in a different way.
- Turkey Trouble by Wendy Silvano – Kids will follow the turkey around the farm as he disguises himself as different animals, so the farmer doesn’t catch him for Thanksgiving dinner! SO entertaining!
- How To Catch A Turkey by Adam Wallace – Check out all the crazy contraptions kids make to try to catch a loose turkey at school!
- Pete The Cat: The First Thanksgiving by James Dean — Every Pete the Cat book is fantastic, but this one has flaps for the kids to open. It’s a great book that every child will love!
- The Night Before Thanksgiving by Natasha Wing — The story is adorable, and young kids will love it.
- Taylor The Tooting Turkey by Humor Heals Us — My boys have always loved talking and laughing about farts!
- I Am Thankful: A Thanksgiving Book For Kids by Sheri Wall — just an all around terrific book for kids learning about being thankful.
I hope you love this paper bag turkey craft idea! It’s easy enough to make with the template that kids can do it themselves (or older kids can help younger kids)!
Pin For Later:
Paper Bag Turkey Craft
This Paper Bag Turkey Craft is a fun Thanksgiving craft the kids will love making! Bright feathers, cute shapes, and silly eyes make for an irresistibly fun project!
Tools
Instructions
- Download and print the pattern and cut out pieces as indicated.
- Assemble 7 feathers by layering the 3 sizes and gluing them together.
- Glue the feathers onto the bottom flap of your bag in a fan shape.
- Glue the headpiece onto the flap over the feathers.
- Glue the chest feathers and legs onto the body piece. Then glue this onto the bag, making sure you slide it a little under the head flap.
- Finish off by adding the snood to the head first, then layer the beak and add the eyes last.

Just love it!
Thankyou for sharing.